I am obsessed with Christmas advent calendars. We had the chocolate ones growing up and a few others around the house and I think it makes the season that much more fun and exciting!
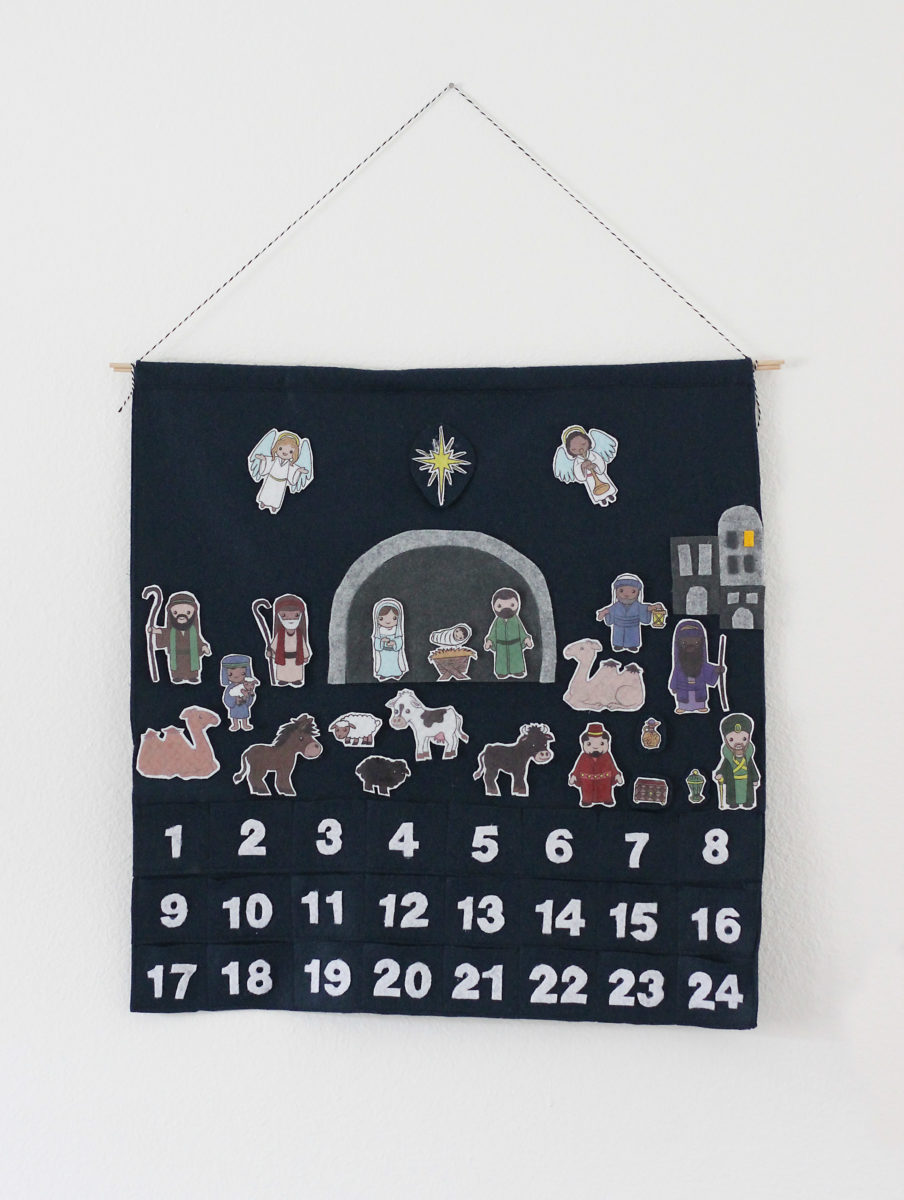
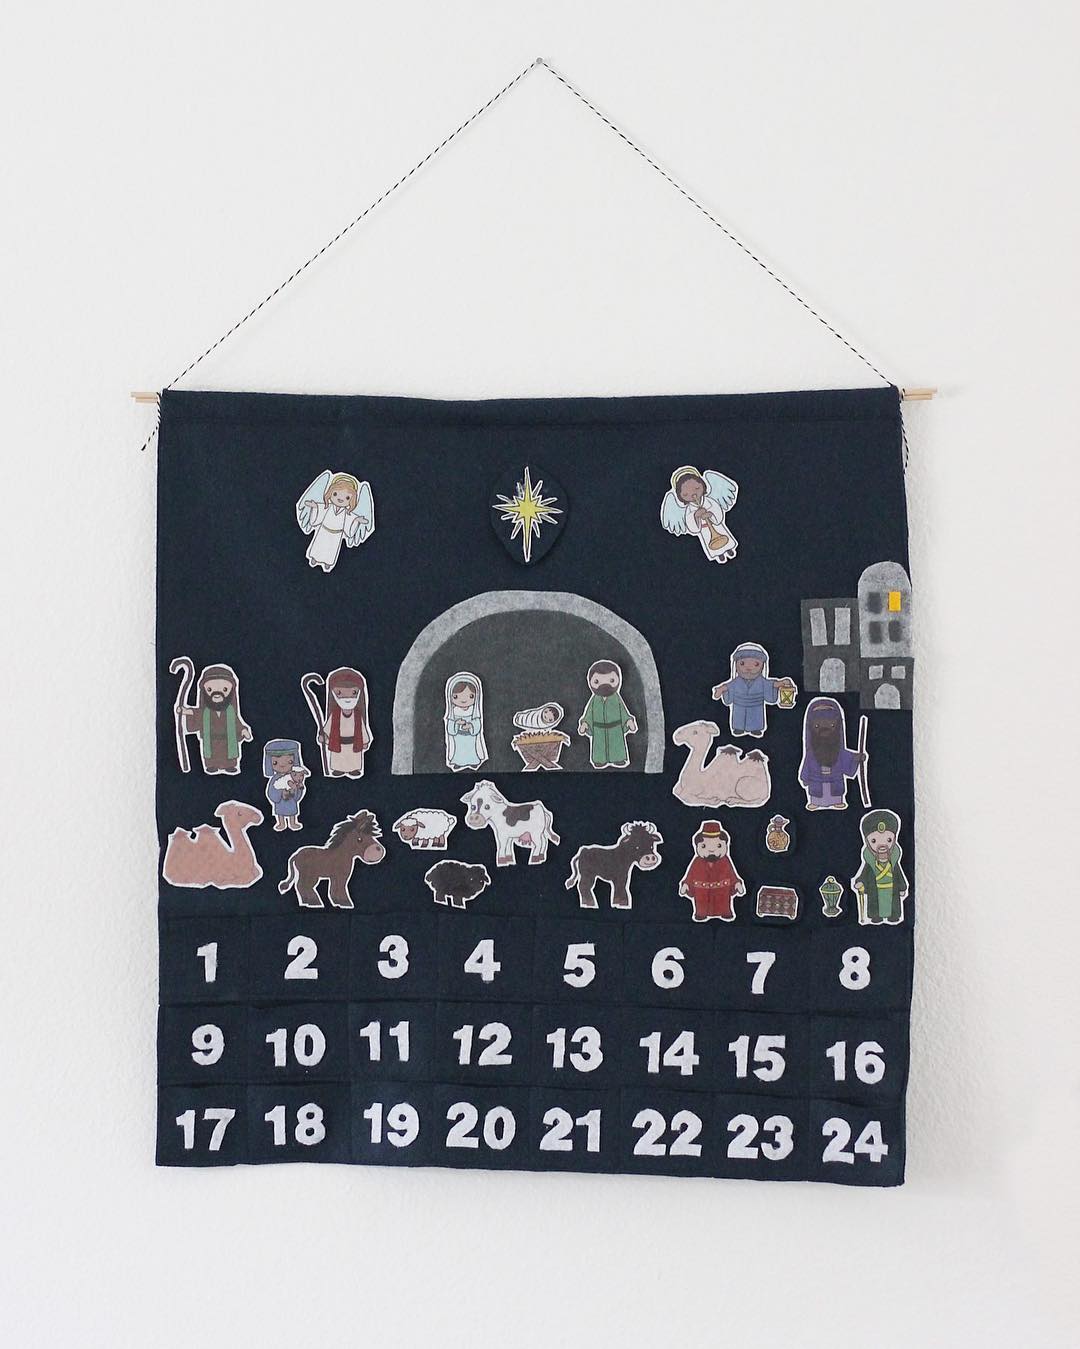
I am the Activity chair for my Relief Society and we decided for November we would make a Nativity Advent Calendar to help keep our Christmas Christ-centered, especially those with kids. I jumped on this idea since I had already done a lot of Pinterest research for a good nativity advent calendar but none of them were up to my style standards — sorry guys! 😉. So I decided to make my own.
And then I realized that cutting out different colors of felt and sewing them together would take WAY too many hours and make it way more complicated than it needed to be. I was too busy (lazy) to make my own so I searched around and found these illustrations with 24 different pieces to the nativity from. You can find the original post here. They were perfect; still had a child-like illustration style that draws kids in, but were simple and modern, plus easy to color in and cut out. I colored them in Photoshop and arranged them on 2 sheets for my project, you can download all the files at the bottom.
Here is what you need:
- 2 Sheets of Transfer Paper
- 2-3 Sheets of White Felt
- Inkjet Color Printer
- Iron
- Sharp Scissors
- 3 Sheets of 12″x18″ Navy Felt (I bought mine here)
- 1 Sheet of Dark Gray Felt & 1 Sheet of Light Gray Felt (bought them at the same shop as the navy felt)
- Hot Glue Gun
- Long stick
- Baker’s Twine (or any string)
- Sewing Machine and navy thread (for backdrop)

Step A: Backdrop
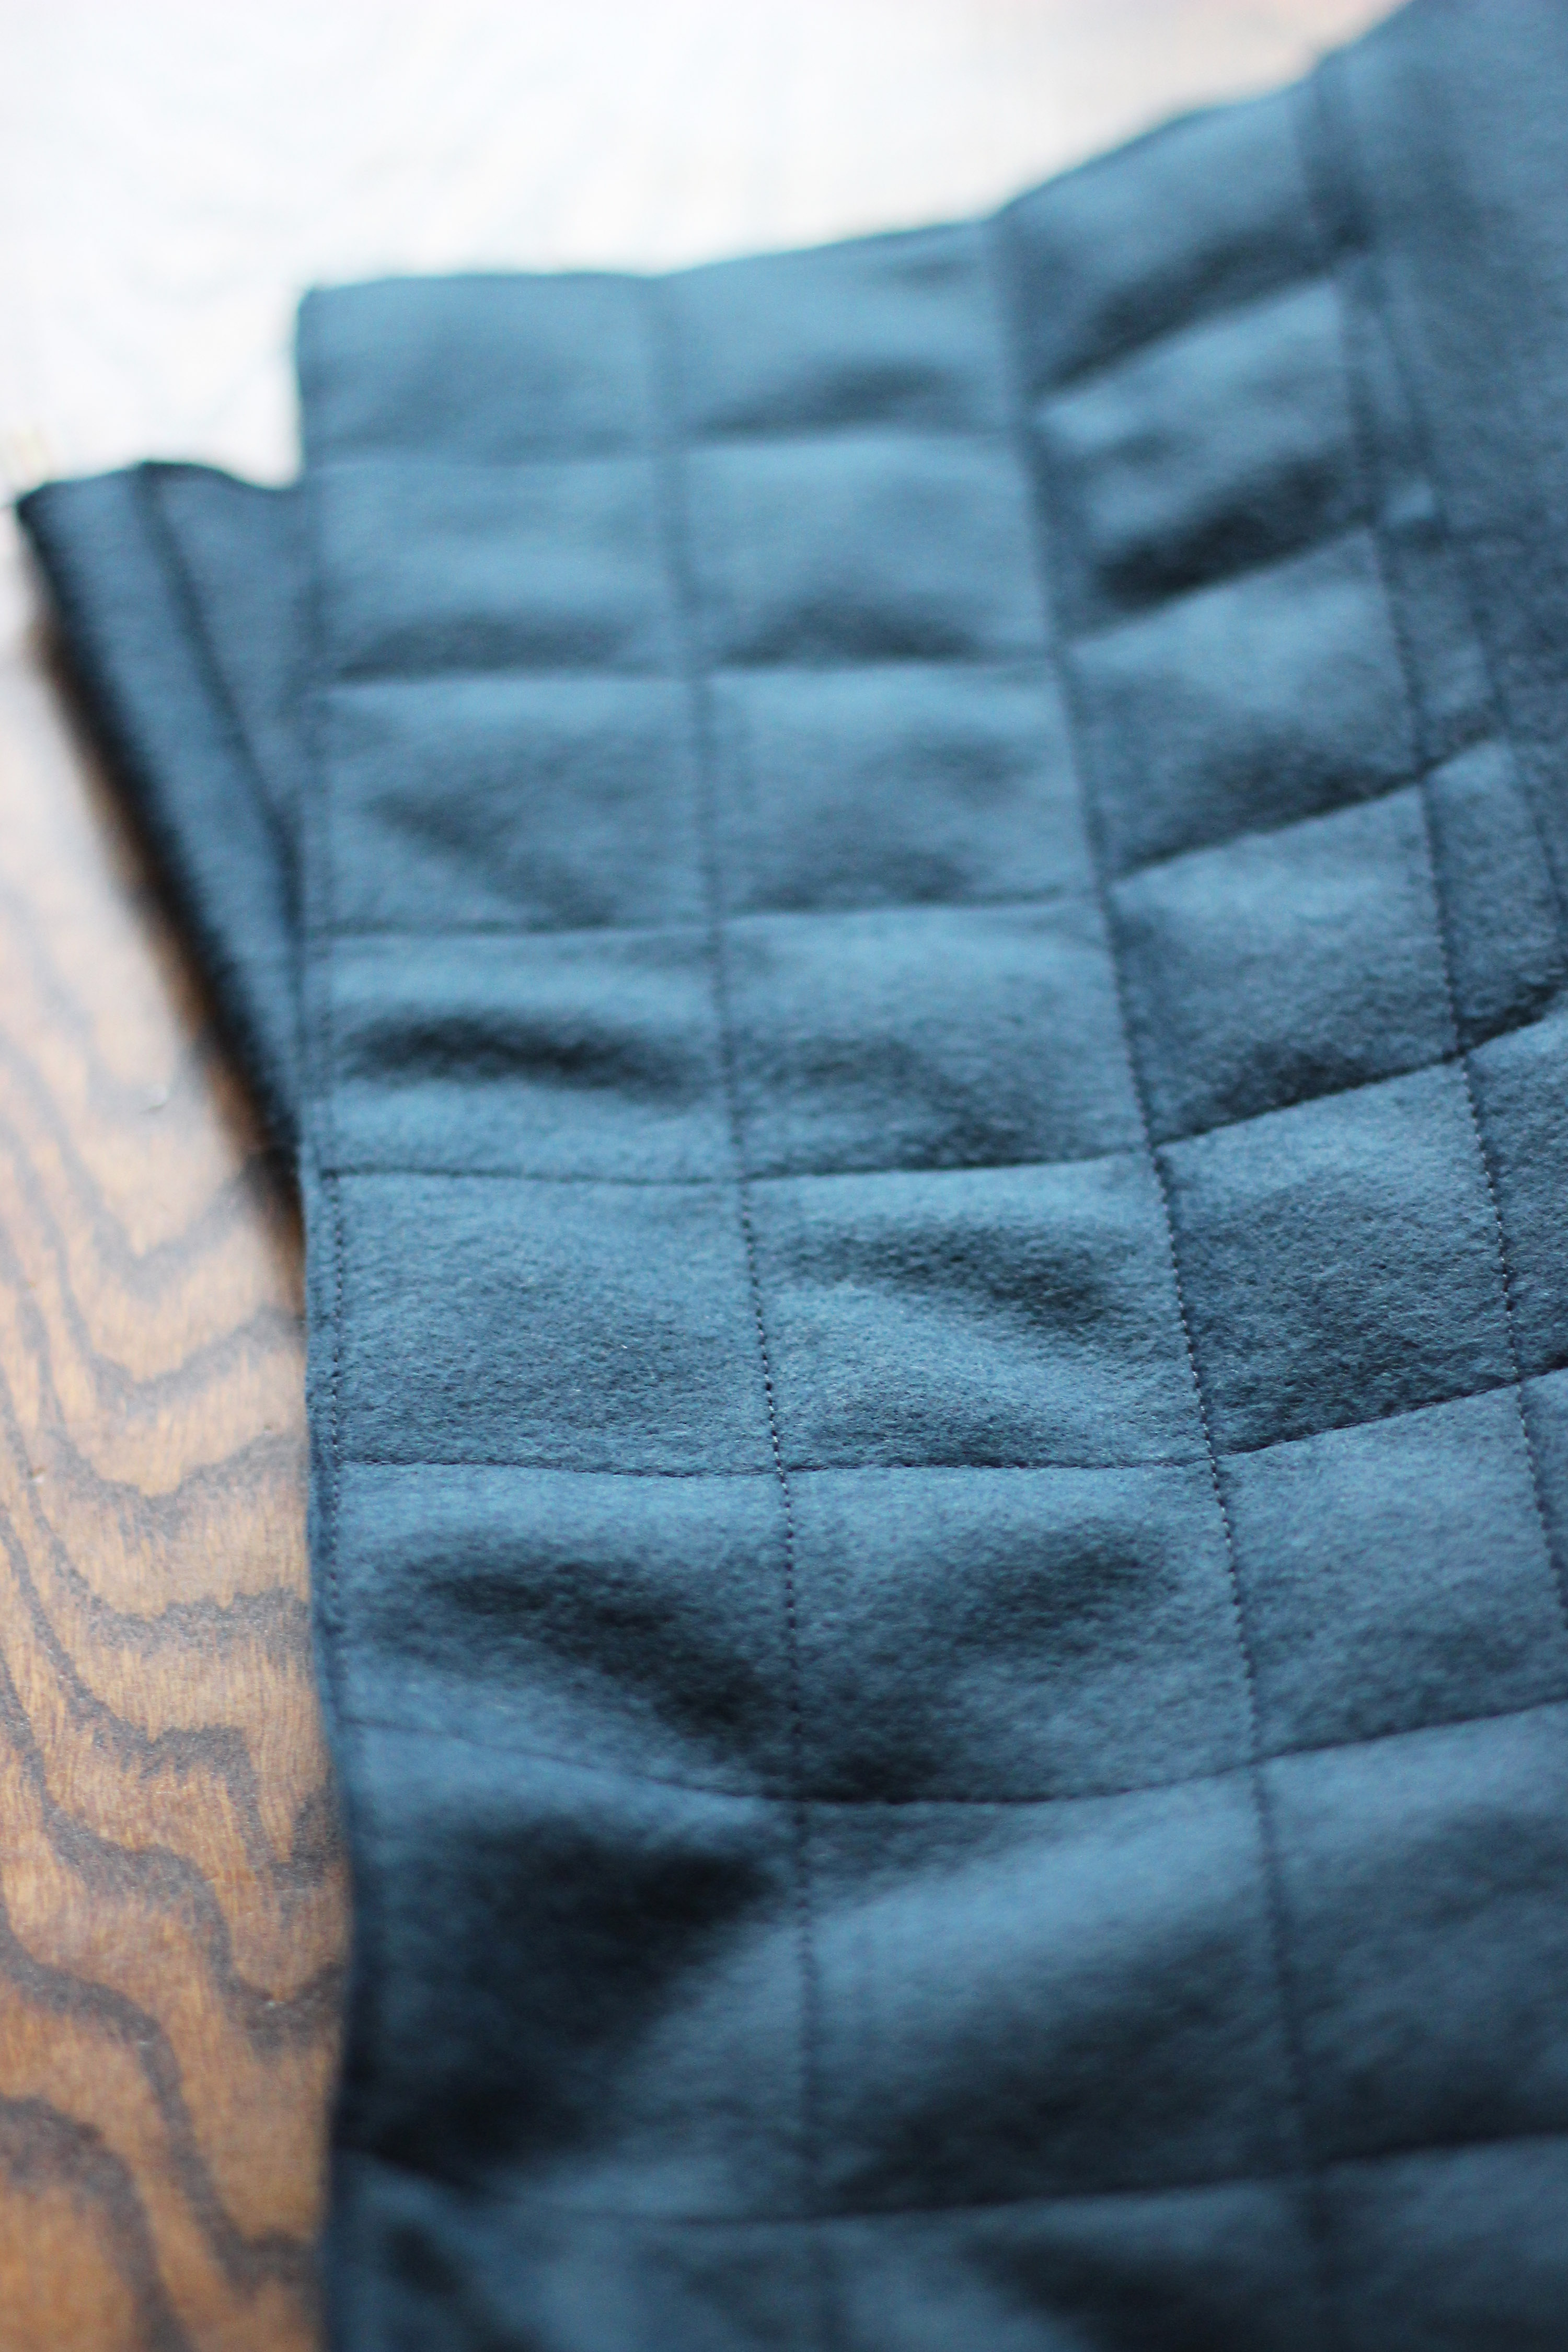
- Take one of your 12×18″ sheet of navy felt and cut in half (hot-dog style). So you have 2 6″x18″ long pieces. Take one and sew the 18″ edge along the edge of the full 12×18″ sheet so you have a large 18×18″ square. If you have a 18×18″ piece of felt then you can skip this step.
- Take your other 6×18″ piece and cut it into thirds long ways. These are your 3 rows of pockets (each row should be about 2″ tall). Lay them on top of the other half piece connected to your large navy felt and sew along the bottom to connect it to the back.
- Now will you make the pockets. Each pocket will be 2.25″ wide so pin and sew straight lines straight up along all three rows. Make sure to sew the edges as well. And now you have 24 pockets! (Make sure it’s 2.25″ and not 2.5″ wide. I made that mistake during our activity and we started sewing only 7 pockets across because of it)
- Take the third 12×18″ felt piece and cut just an inch or so off the long side. Wrap into a loop and sew on the back of the top edge with enough room for a stick to fit. If you only bought 2 12×18″ sheets just loop the top and sew a horizontal line to slide in the stick.
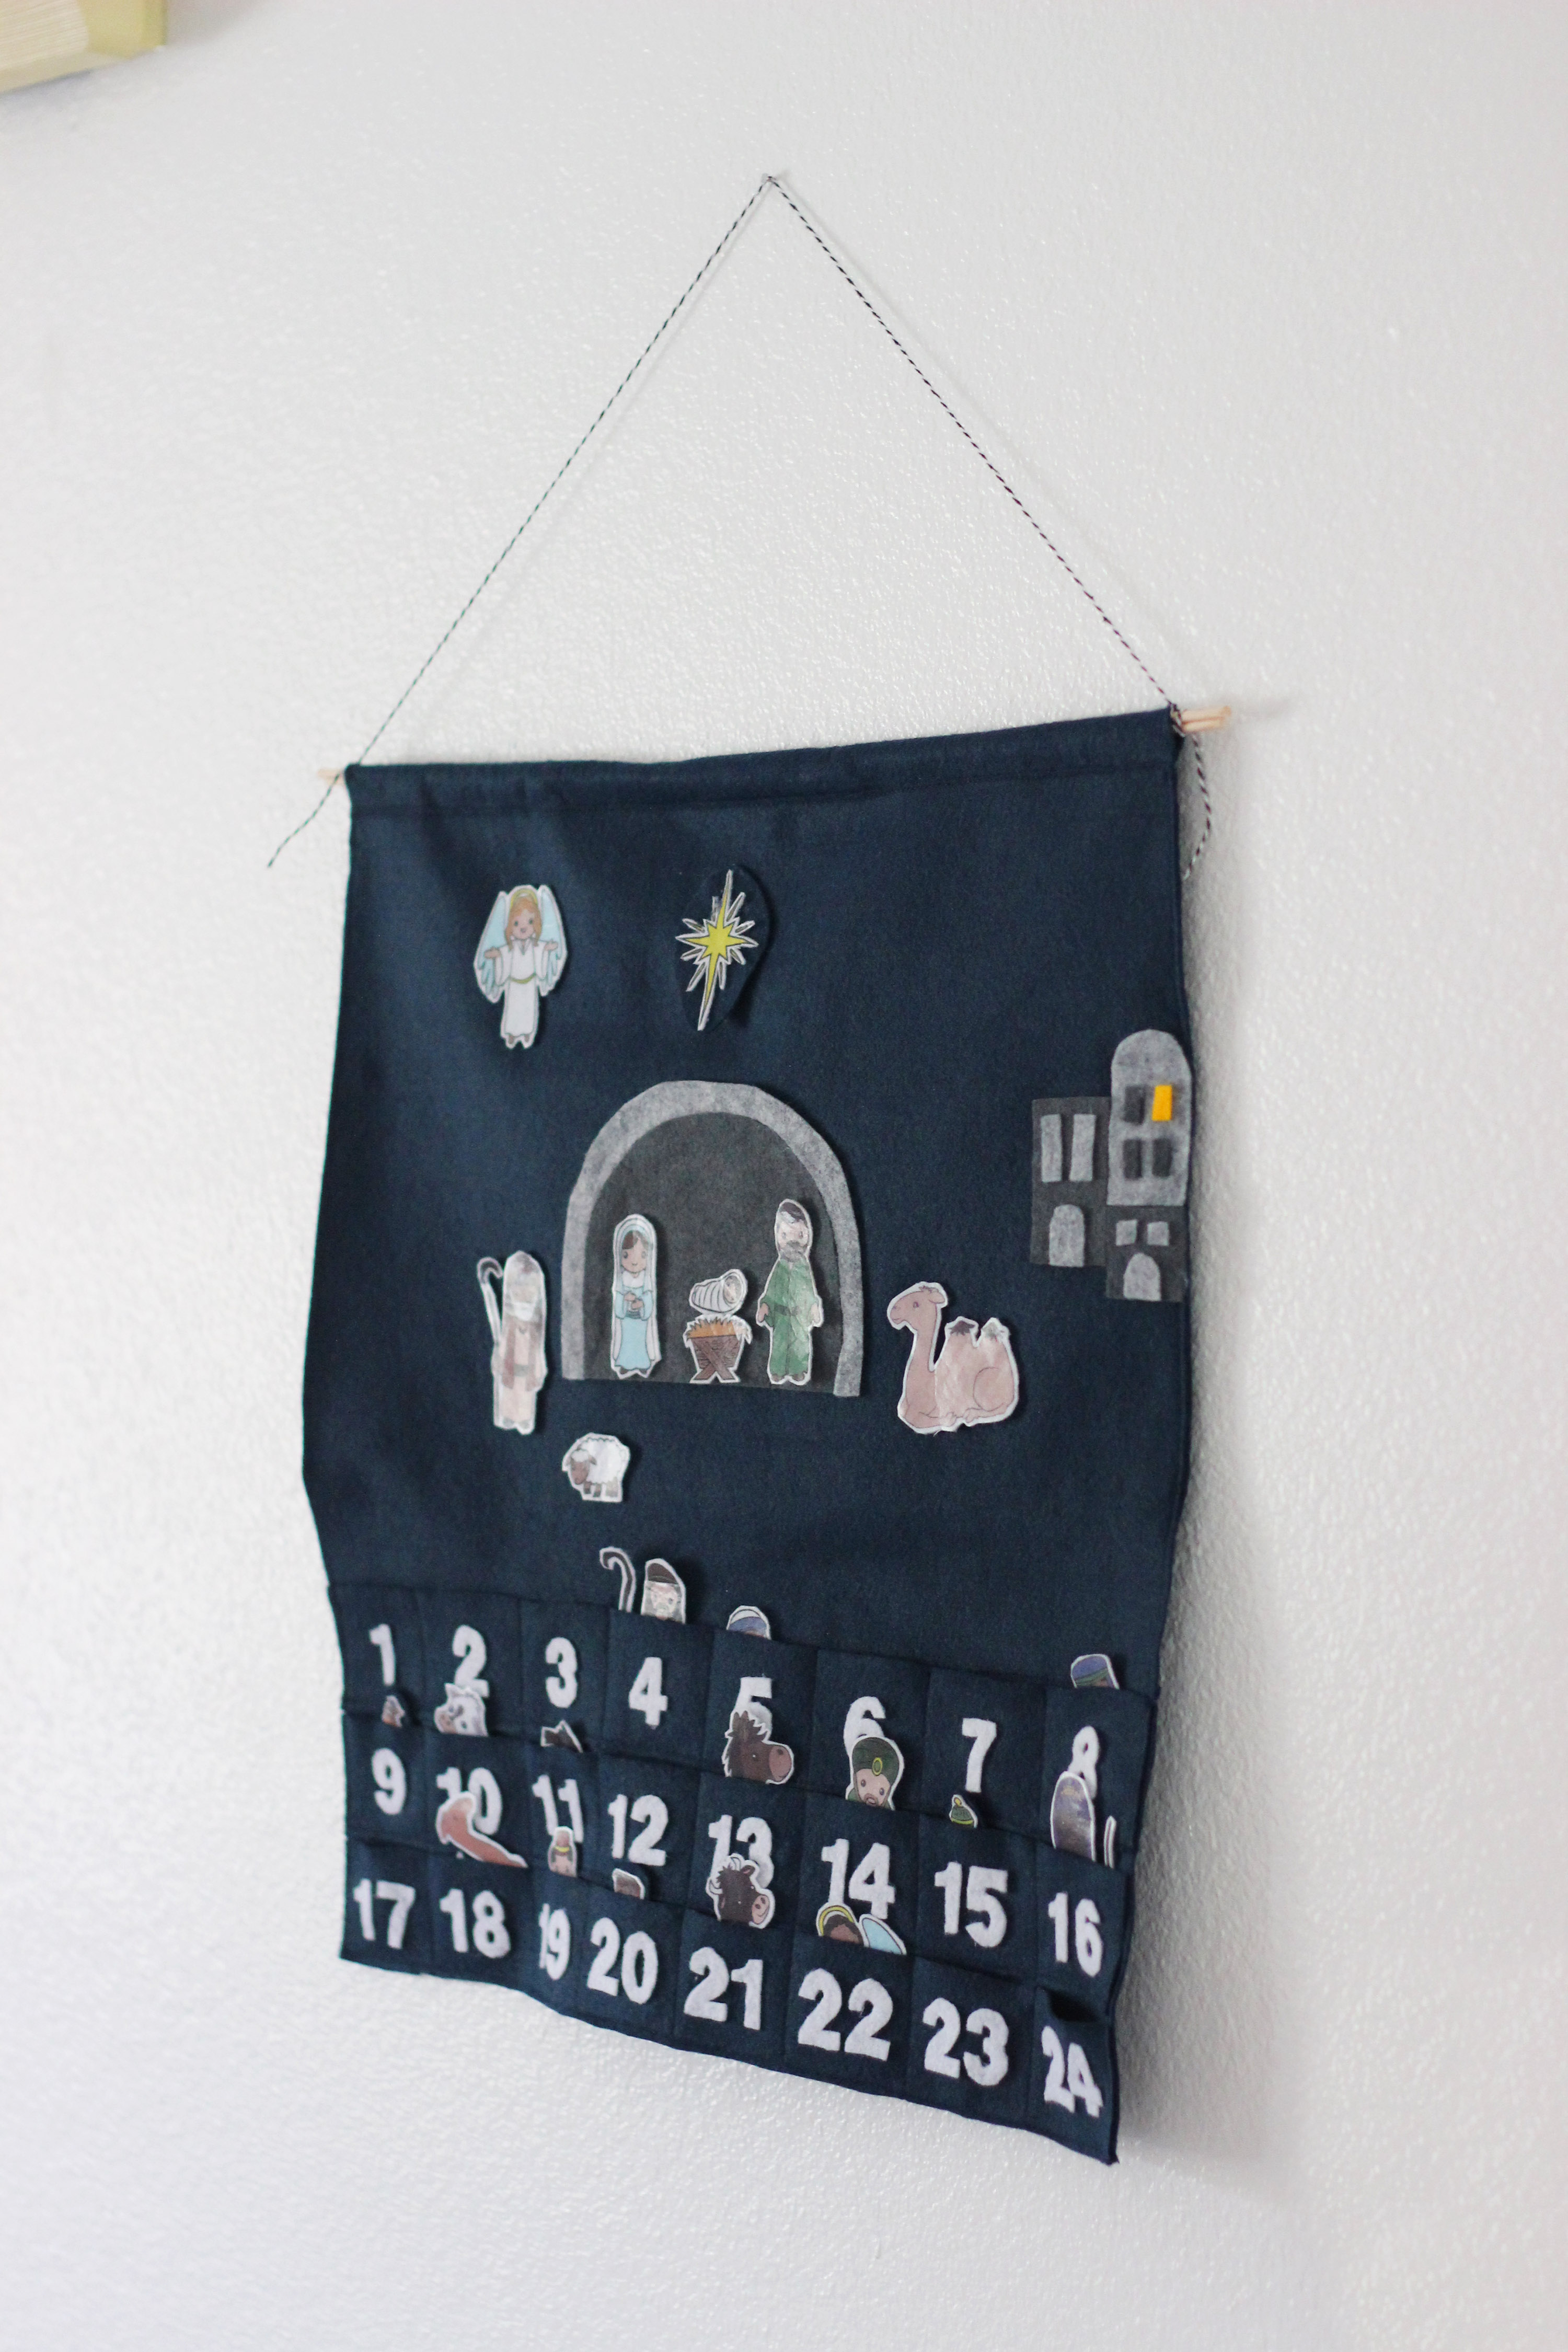
- Cut out the stable and Bethlehem pieces in the felt and place with hot glue. The stable is large and my hot glue gun is a cheap dinky one so I had to go back and hot glue again around the edges so it really stuck.


Step B: Creating the 24 Pieces and Numbers
- Print out the pieces template on the transfer paper. Make sure to print it on the correct side. Once printed, cut out along the edges so you don’t waste all that white space. Place them face down on top of the white felt and iron them on. Make sure to iron them completely, especially the edges. Let cool and then peel off the top layer.
- With sharp scissors cut out each piece to your liking and they’re ready!
- With the numbers template, print on normal copy paper and use as a template for your numbers. This took the most time since they are somewhat intricate. Sharp scissors are key! I have some Gingher scissors which made a huge difference.
- Hot glue the numbers onto the pockets. I also took the small pieces (wise men presents and star) and backed them with extra navy felt so they had more surface area.
- Tie a string to each end of the stick and it’s ready to hang!

I didn’t have to use velcro or anything, the felt pieces stuck nicely on their own. If bumped a few will fall so if you want them more secure, add some velcro to the back of each piece. I wanted the freedom to place a piece anywhere and keep the backdrop as simple as possible so I left them as is.
If you do not have a sewing machine you could even skip the pockets and just have a box or bag of your felt pieces and it still works great! Go ahead and even blow up the pages double in size and make a huge felt board! There are no limits! 😉


I can’t wait to see your creations. This is as simple as an advent calendar gets and you have the whole month to get started on it before December 1st comes. Enjoy!
Download Nativity Pieces arranged for 1 person
Download Nativity Pieces arranged for multiple people